Create an unattened.xml

To create an unattened.xml you have a few options one is to use the windows system image manager.

Firstly, open the windows system image manager application

1

Open up your windows image and select the install wim (in my case windows 10)

2

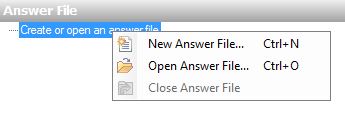
Next select new answer file

3

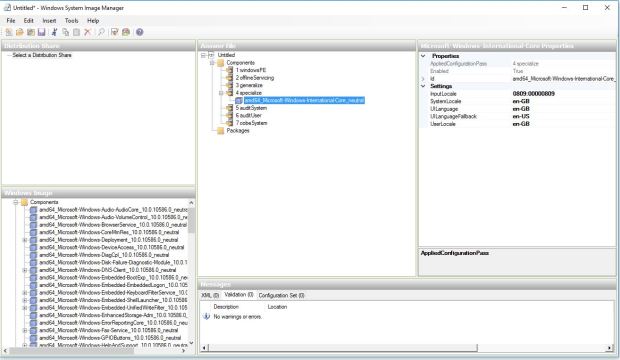
Now you can make customizations, in this case I will change the language input to GB British

Expand components and find amd64_Microsoft-Windows-International-Core_6.3.9600.16384_neutral

Now change the settings to the following:

InputLocale: en-GB

SystemLocale: en-GB

UILanguage: en-GB

UILanguageFallback: en-US

UserLocale: en-GB
4

Next select tools and validate the changes, you should get no warnings or errors, if that’s the case you can now save the answer file and name it appropriately

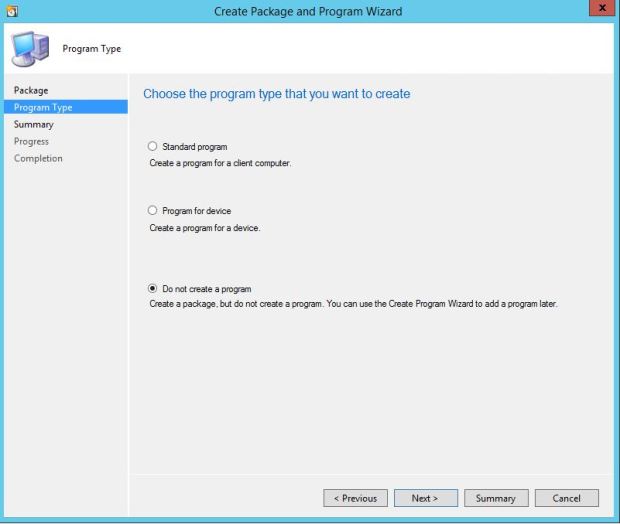
Next copy the file to a share you use for configmgr deployments and create a package (with no program) and distribute
5

In your task sequence under apply operating system select the package you just created and type in the file name including the file extension

6

Start Menu layout

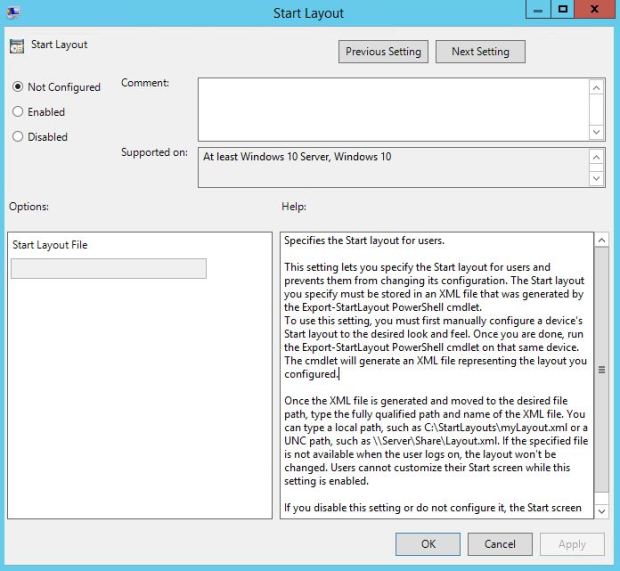
To apply he start menu layout your first need to have your xml in a location the computer has read access to or user depending how you apply the GPO. You will also need either enterprise or education editions of windows 10.

Navigate to Computer Configuration > Administrative Templates >Start Menu and Taskbar (or user configuration )

1

Any changes you make to the xml will still apply as long as the time stamp of the file changes.

Create Default Applications XML

To create a default applications template you first need all the software you plan to use as the defaults installed, for example Adobe Reader.

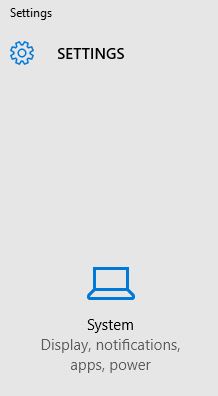
Firstly, navigate to settings

1

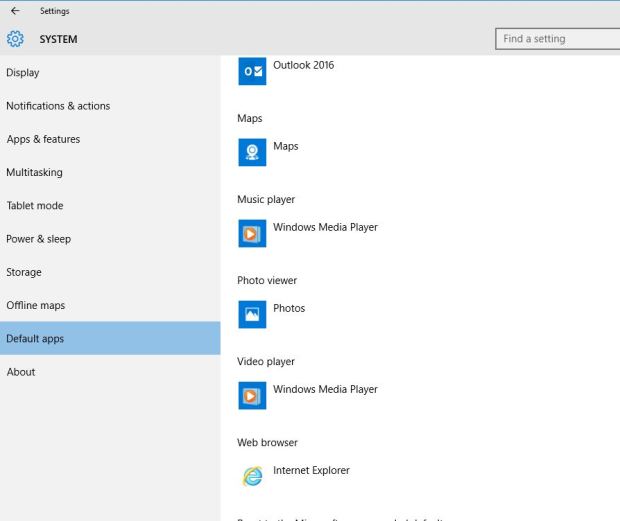
Then default apps and start to make the changes, quick tip even if you have set Adobe to be the default reader when you first open the application or during an install you will still need to change the setting from edge under the PDF file extension.

2.JPG

open an elevated command prompt

And type in

dism /online /Export-DefaultAppAssociations:”%UserProfile%\Desktop\StaffDefaultApplications.xml

3

you can find more information below

https://technet.microsoft.com/en-us/library/hh825038.aspx?f=255&MSPPError=-2147217396

now we have the xml we can either apply during a task sequence or via group policy, please see the guide below for an example of the group policy

Set Default Associations

To set default Associations (applications) via group policy you first need to export your default applications settings, once you have done so move the XML to a share that domain computers have read access to

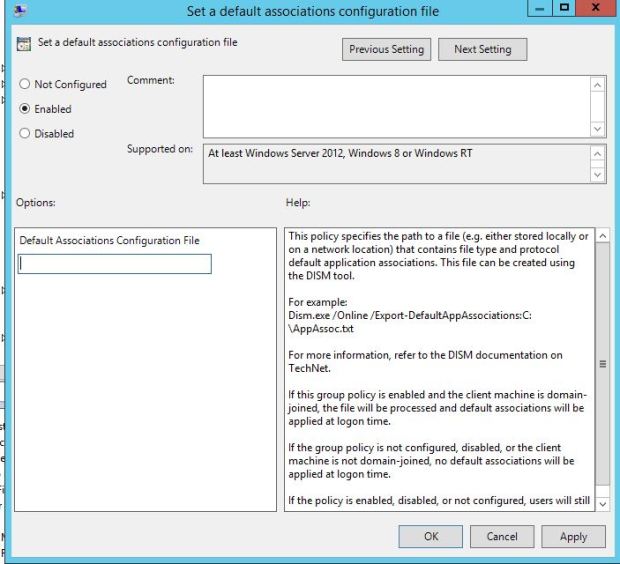
Now navigate to Administrative Templates\Windows Components\File Explorer\Set a default associations configuration file1.JPG

Custom Start Menu Windows 10

So I wanted to make the transition to windows 10 as smooth as possibly for our users and I noticed in a test group their biggest issues were actually signing out.  Now my hope is in time we can resolve this issues with training however I wanted to help them out by adding an obvious shortcut.

Firstly, create the shortcuts by follow my guide below

Sign Out shortcut Windows 10

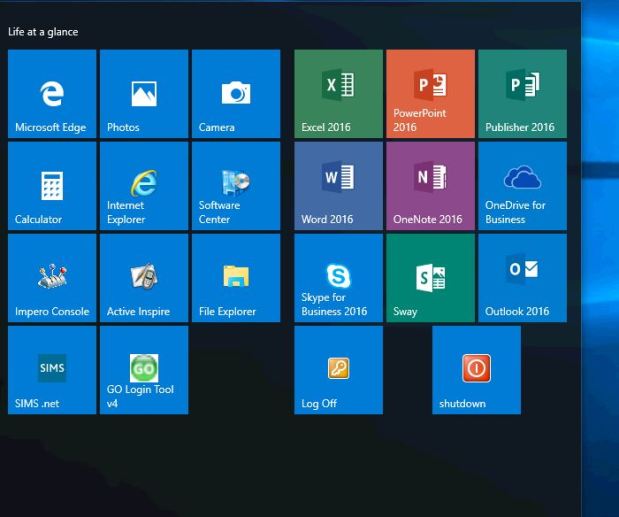
Once created copy any other shortcuts and pin them to the start menu along with the shutdown.ink

If you want to know more about the default layout take a look at the link below

https://msdn.microsoft.com/en-us/library/windows/hardware/mt171092%28v=vs.85%29.aspx

Next create the layout you want a include the the sign out “log off” and shutdown shortcuts.

1.JPG

Now we are happy we need to export the layout using PowerShell

Us this command Export-Startlayout –path C:\ Startmenu.xml

2.JPG


Now we need to edit the xml so that the location is now in

DesktopApplicationLinkPath=”%ALLUSERSPROFILE%\Microsoft\Windows\Start Menu\Programs\Accessories\shutdown.lnk”/>

3.JPG

You will need to change the file name if it differs from your shortcut including the file extension
Now we have this xml we can enforce is as part of a task sequence or as I prefer on this occasion via group policy. Please see my link below on how to apply with Group policy (assuming your using enterprise edition or education edition of windows 10)


If you wish to add the menu during the OSD you can use this powershell command

 Import-StartLayout -LayoutPath c:\tmp\start.xml -MountPath $env:SystemDrive\

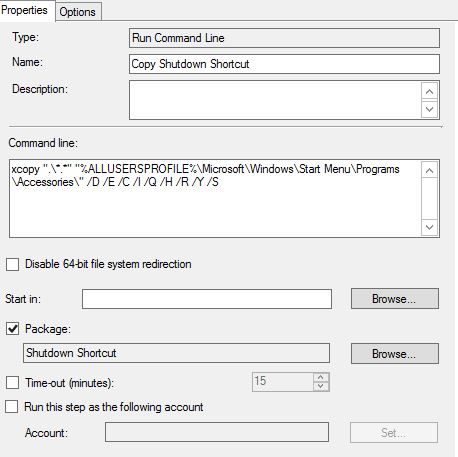
 The final steps are to copy the logout shortcut to the location we referenced in the xml, to do this create a package in ConFigMgr

 Now we can add this to our task sequence by adding a run command, select the logout package and then using the xcopy command below.

4.JPG

I took inspiration from Jörgen and his Internet explorer post on his blog below

http://ccmexec.com/

Sign Out shortcut Windows 10

I decided to create shortcuts for some of my users who are struggling with the change to windows 10 , my solution to there signing out issue is to create some shortcuts in more obvious place. In this blog post I will show you how to create a sign out shortcut.

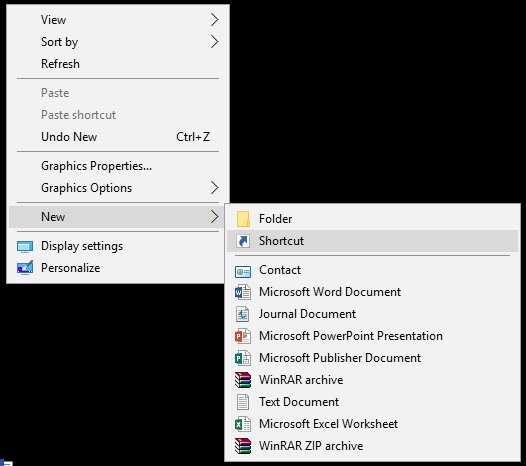
Firstly right click on the desktop and select shortcut

1

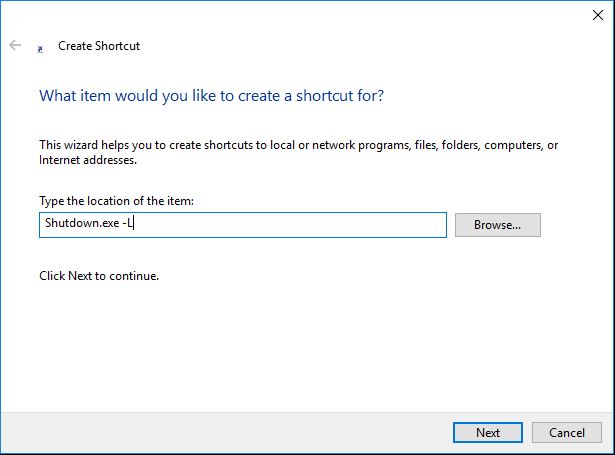
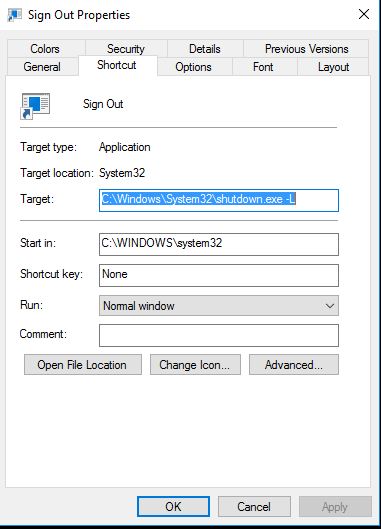
Next copy this command Shutdown.exe –L and select next

2

If you want to create others here is a list

Restart  Shutdown -r -t 00

SetSuspendState Suspend rundll32.exe PowrProf.dll,

Shutdown Shutdown -s -t 00

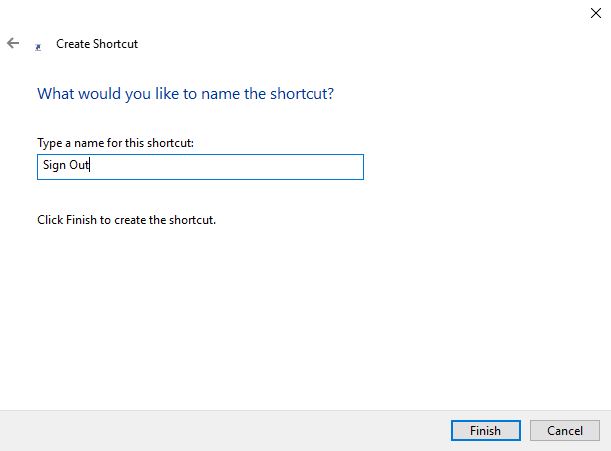
Give the shortcut a name , in this example sign out and select finish

3

Now you can test your shortcut

Now its time to add an a familiar icon

Now right click the shortcut and go to properties

5

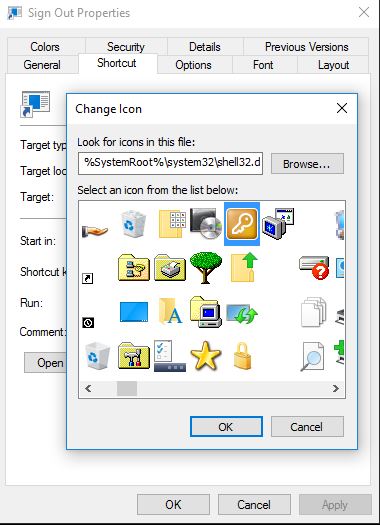
Select change icon and select the appropriate one

6

7

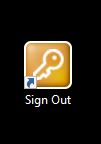
You can now pin to start or even just leave it on the desktop

Set Custom lock screen

To set a custom lock screen via group policy first make sure you have installed the latest windows 10 ADMX files installed in your PolicyDefinitions folder.

Next navigate to COMPUTER CONFIGURATION > POLICIES > ADMINISTRACTIVE TEMPLATES > CONTROL PANEL > PERSONALIZATION >

1

2

Select force default lock screen image

Enable the policy and select a jpeg in a location that the computer will have read access to.

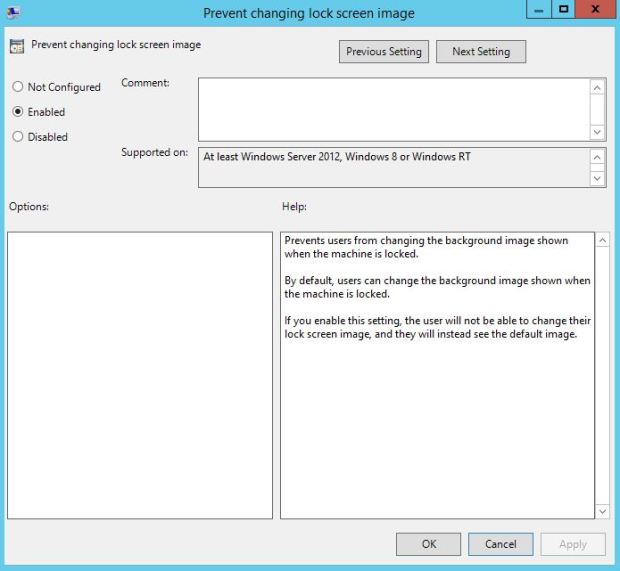
You can also stock any users changing the lock screen by selecting and then enabling Prevent change of lock screen image policy

Turn Off Windows Store

To disable the Windows store on Windows 10 first make sure you have install the latest windows 10 ADMX files and added them to your PolicyDefinitions folder.

1

2

Firstly, navigate to COMPUTER CONFIGURATION > POLICIES > ADMINISTRACTIVE TEMPLATES >WINDOWS COMPONENTS/STORE

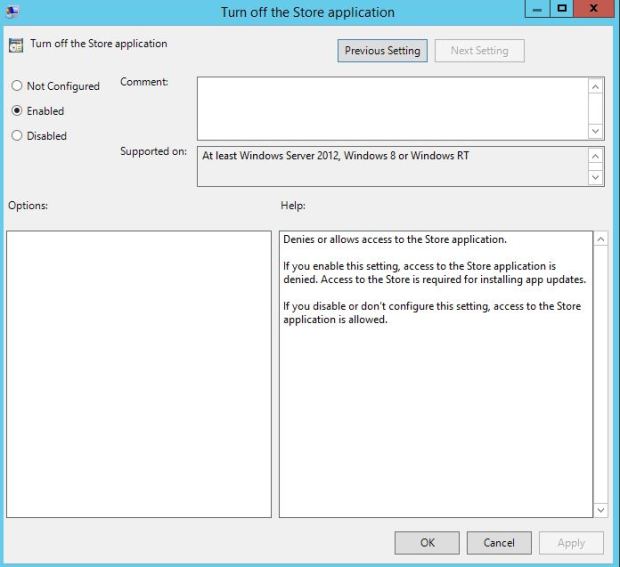
Then select and enable turn off store application

You also have the option to turn off other store features.

Turn Off Windows Defender

To turn off windows defender on windows 10 first make sure you have install the latest windows 10 ADMX files and added them to your PolicyDefinitions folder.

1

Firstly to go COMPUTER CONFIGURATION > POLICIES > ADMINISTRACTIVE TEMPLATES >WINDOWS COMPONENTS

And then select Turn Off Windows Defender

Disable the Order Prints

To disable the “Order Prints” picture task first make sure you have install the latest windows 10 ADMX files and added them to your PolicyDefinitions folder.

1

Then navigate to USER CONFIGURATION> ADMINISTRATIVE TEMPLATES> SYSTEM> INTERNET COMMUNICATION SETTINGS

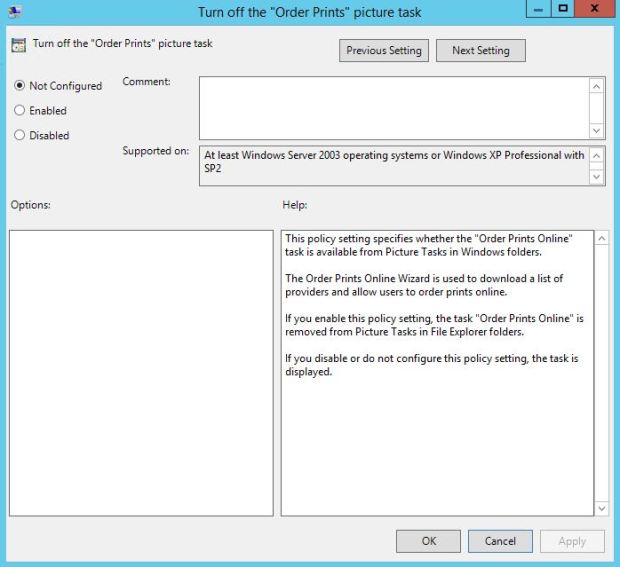
Then select and enable Turn off the “order prints” Picture Task