Deploying Windows Movie maker 12

Firstly, you need to download windows essentials from this link below

https://support.microsoft.com/en-gb/help/17779

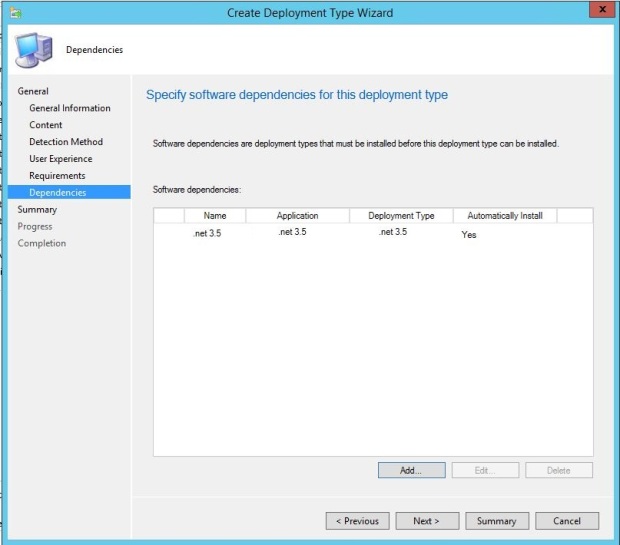
You will need to have .net 3.5 installed, in my case I already have this installed but it’s something to be aware of

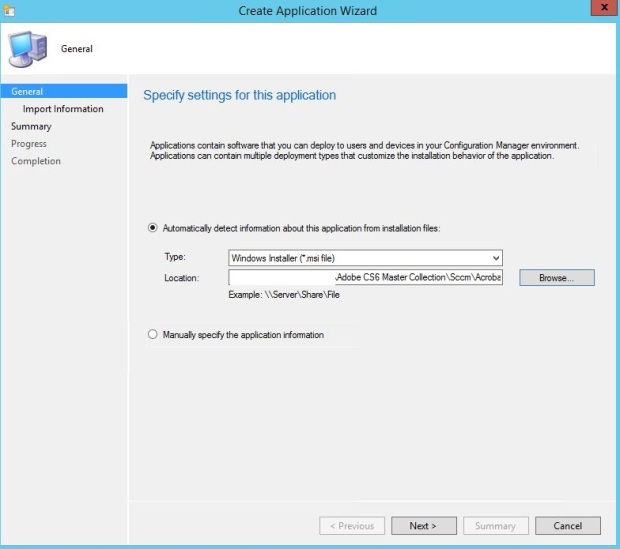
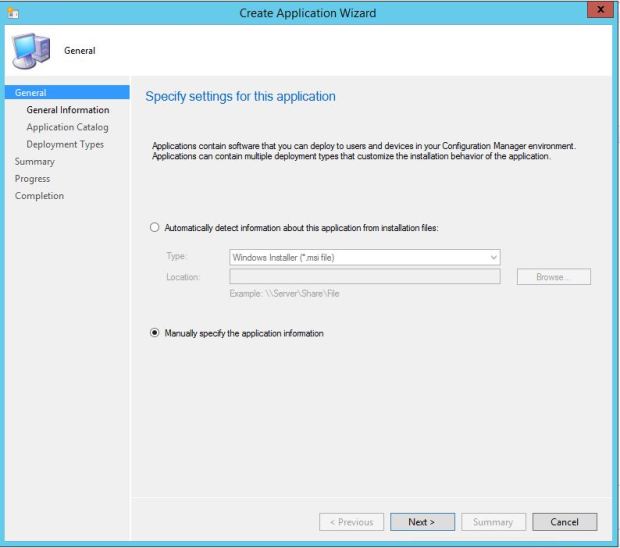
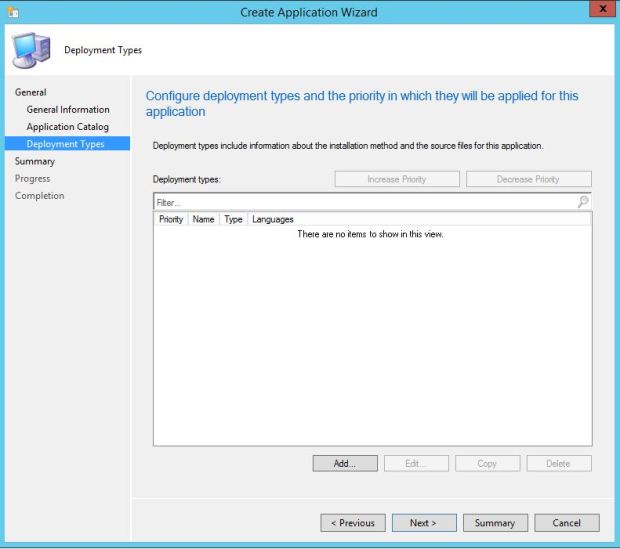
Once you’ve moved the Windows essentials to a share create a new application

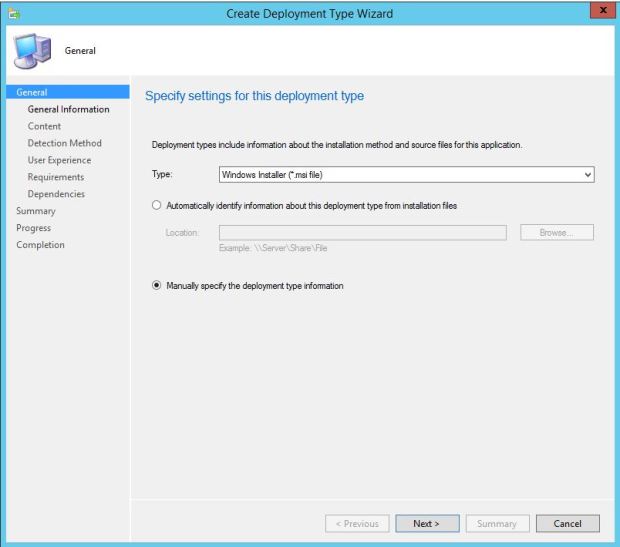
Then select Manually specify the application information

1

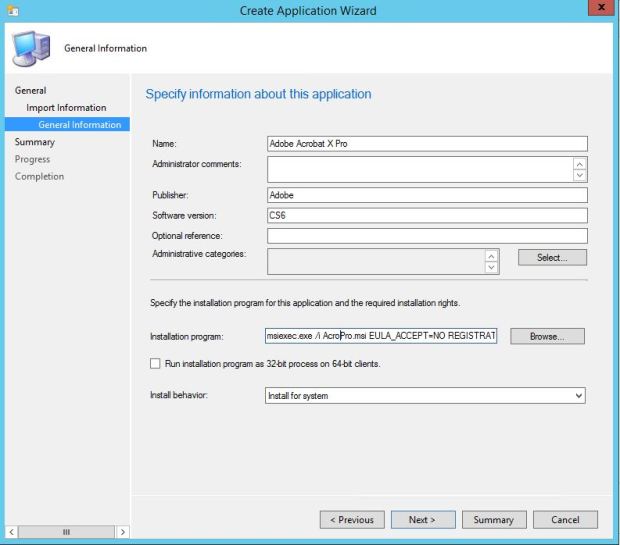
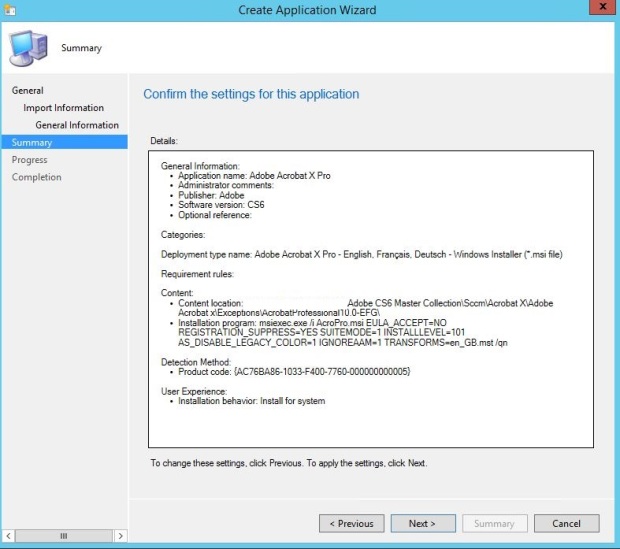
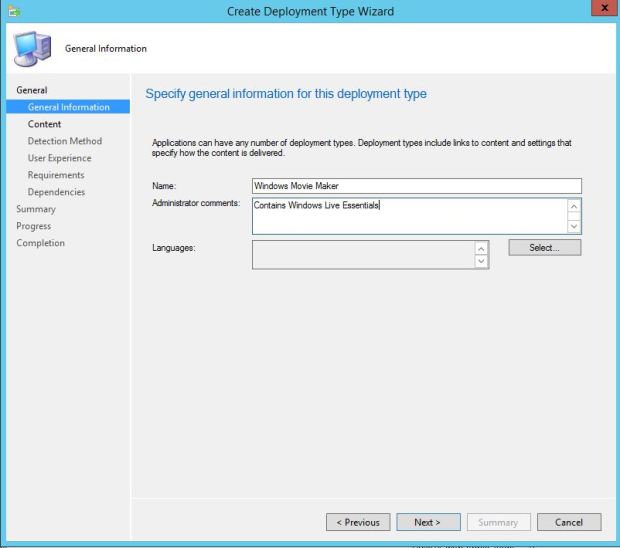
Next name the application appropriately

2

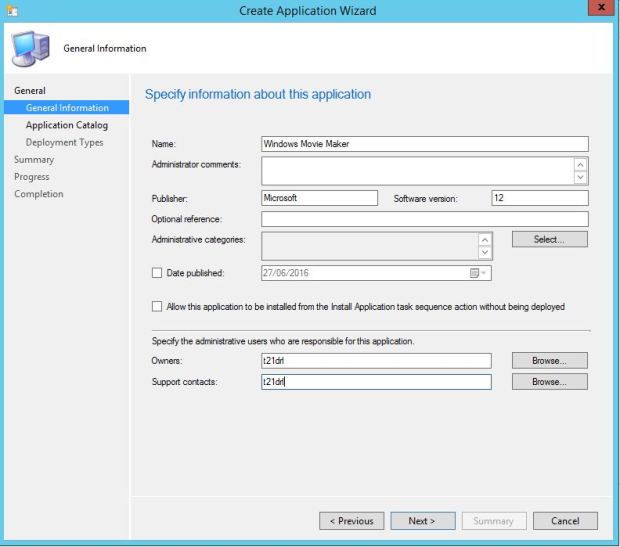
You can then add any additional information and or icon
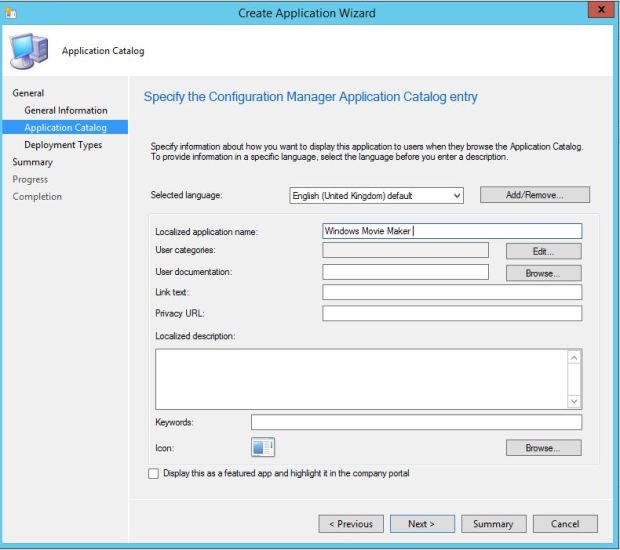
3

Next select Add

4

Select Manually specify the deployment type information

5

Again name appropriately

6.JPG

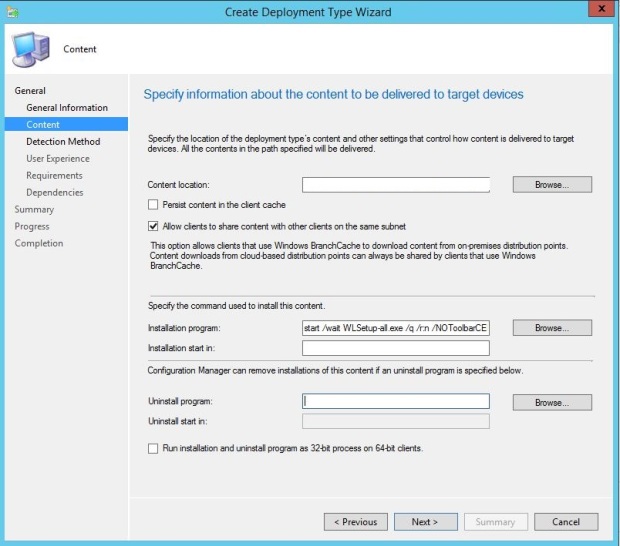
locate correct share location and replace the the installation program with this command thanks to pcloadletter.co.uk

wlsetup-all.exe /q /NoLaunch /NoToolbarCEIP /NoHomepage /NoSearch /AppSelect:Writer,MovieMaker

7.JPG

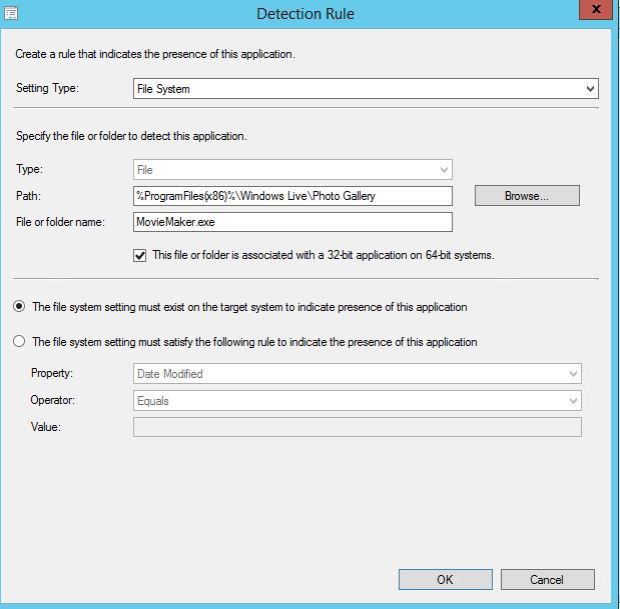
now we need to create a detection rule, Ive used the file system but you can just as easily use a registry rule or any other method
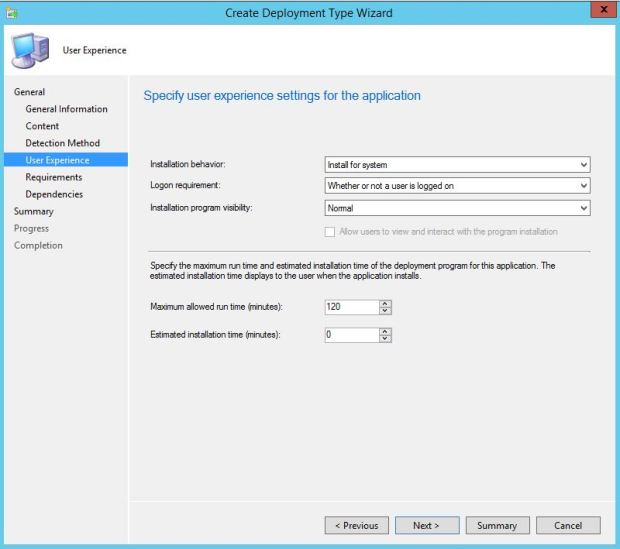
9.1

Install for system

9.JPG

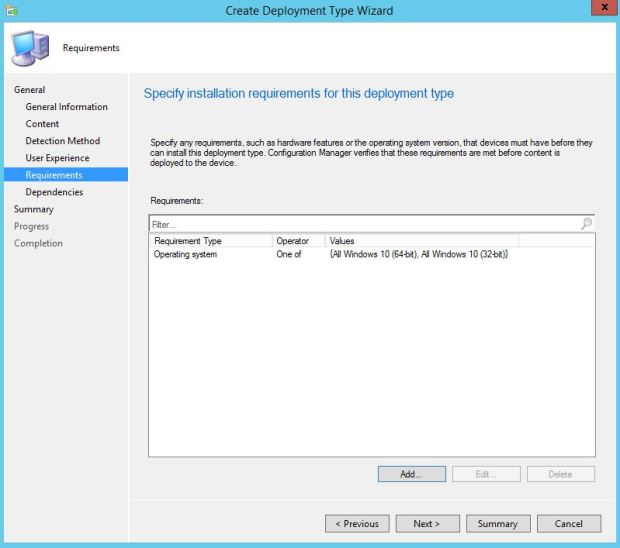
I have set a requirement for windows 10, this is optional

10

I have set the dependency for .net 3.5 this is optional

11.JPG

Select next and then distribute as you wish

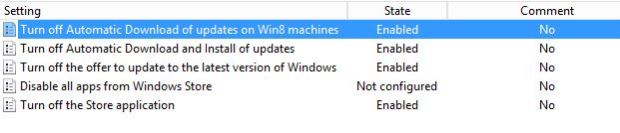
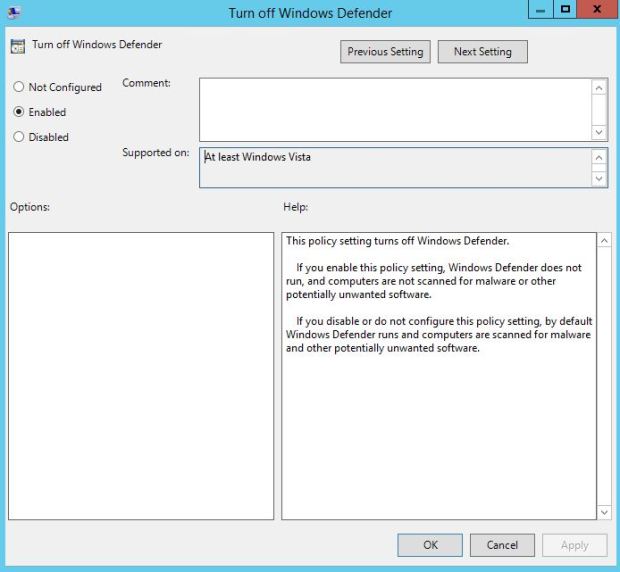
There are some registry changes that can be made to suppress any EULA agreements and Microsoft account sign-in, I will do these at a later date.

Set Custom lock screen

To set a custom lock screen via group policy first make sure you have installed the latest windows 10 ADMX files installed in your PolicyDefinitions folder.

Next navigate to COMPUTER CONFIGURATION > POLICIES > ADMINISTRACTIVE TEMPLATES > CONTROL PANEL > PERSONALIZATION >

1

2

Select force default lock screen image

Enable the policy and select a jpeg in a location that the computer will have read access to.

You can also stock any users changing the lock screen by selecting and then enabling Prevent change of lock screen image policy

Turn Off Windows Store

To disable the Windows store on Windows 10 first make sure you have install the latest windows 10 ADMX files and added them to your PolicyDefinitions folder.

1

2

Firstly, navigate to COMPUTER CONFIGURATION > POLICIES > ADMINISTRACTIVE TEMPLATES >WINDOWS COMPONENTS/STORE

Then select and enable turn off store application

You also have the option to turn off other store features.

Turn Off Windows Defender

To turn off windows defender on windows 10 first make sure you have install the latest windows 10 ADMX files and added them to your PolicyDefinitions folder.

1

Firstly to go COMPUTER CONFIGURATION > POLICIES > ADMINISTRACTIVE TEMPLATES >WINDOWS COMPONENTS

And then select Turn Off Windows Defender

Disable the Order Prints

To disable the “Order Prints” picture task first make sure you have install the latest windows 10 ADMX files and added them to your PolicyDefinitions folder.

1

Then navigate to USER CONFIGURATION> ADMINISTRATIVE TEMPLATES> SYSTEM> INTERNET COMMUNICATION SETTINGS

Then select and enable Turn off the “order prints” Picture Task

Disable Quiet hours

To disable the Quiet hours on Windows 10 first make sure you have install the latest windows 10 ADMX files and added them to your PolicyDefinitions folder.

1

2

Next navigate to USER CONFIGURATION > POLICIES > ADMINISTRATIVE TEMPLATES > START MENU AND TASKBAR > NOTIFICATIONS

Then select and enable TURN OFF QUIET HOURS

You can also set quiet hours and turn on or off other features.

Turn off InPrivate browsing

To turn off InPrivate browsing in Edge there is a similar group policy to the IE one.

First make sure you have install the latest windows 10 ADMX files and added them to your PolicyDefinitions folder

1

To do this navigate to Computer Configuration>Administrative Templates>Windows Components>Microsoft Edge

Then select and Turn off InPrivate browsing 

Turn off Cortana

To turn off Cortana in windows 10 via group policies firstly make sure you have installed the latest version of the windows 10 ADMX .

1

Then navigate to Computer Configuration -> Administrative Templates -> Windows Components -> Search

Then select allow Cortana and change it to disable.

Then apply and or link to this to the OU you wish to apply these setting to.

Adobe Acrobat Reader X

To Deploy adobe acrobat reader X firstly extract the ISO and then download the adobe AAMEE application and install. Please see the link below.

http://www.adobe.com/devnet/creativesuite/enterprisedeployment.html

next open AAMEE and select install Package

1.JPG

Point the installation folder to the extracted ISO and the name the package

2

Next type in your serial number

3

Sign in with your Adobe ID

5.JPG

Select Acrobat X Pro

6

Disable End User License Agreement and Improvement Program. The other option depends on your environment so select the appropriate options

7

Once the build is complete open the new folder and navigate to the exceptions folder and you should see something similar to this

89

Now copy the folder over to a location you use for your source files

In configmgr select create application and then name the application

Select the msi

10

Next change the installation program to this

11

msiexec.exe /i “AcroPro.msi” EULA_ACCEPT=NO REGISTRATION_SUPPRESS=YES SUITEMODE=1 INSTALLLEVEL=101 AS_DISABLE_LEGACY_COLOR=1 IGNOREAAM=1 TRANSFORMS=en_GB.mst /qn

The “Acropro.msi” will be whatever you named your msi when we create the serialized install and the en_GB will depend on the language you’ve have chosen to use

12.JPG

Select next then deploy application as you see fit.

Turn off Auto fill in Edge

To turn off Auto fill in Edge there is a similar group policy to the IE one

First make sure you have install the latest windows 10 ADMX files and added them to your PolicyDefinitions folder

1

To do this navigate to Computer Configuration>Administrative Templates>Windows Components>Microsoft Edge

Then select and Enable turn off Autofill